Popular in your industry


Related Searches:


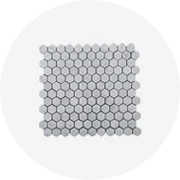
Top categories


About styrofoam ceiling
Introduction
Welcome to the world of home improvement, where even the most unexpected materials can transform your living space. Today, we delve into the realm of Styrofoam ceiling tiles, a versatile and practical choice for homeowners looking to revamp their interiors. These lightweight, customizable tiles have a rich history dating back to the Muromachi Period in Japan and offer a plethora of benefits, from aesthetic appeal to insulation. Whether you're aiming for a modern pattern or a vintage-inspired look, Styrofoam ceiling tiles can elevate your room's ambiance while providing practical benefits such as easy maintenance and durability.
Discovering Styrofoam Ceiling Tiles
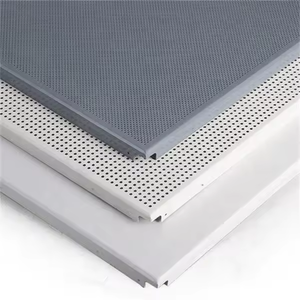
Styrofoam, or polystyrene, ceiling tiles are lightweight, flexible, and paintable. These tiles can be applied to barrel type ceilings due to their slight flexibility. Polystyrene tiles can be painted with a water-based paint, allowing for customization. However, they cannot be bent completely or they risk breaking. They are also lighter than PVC designs, making them a practical choice for any ceiling.
Benefits of Styrofoam Ceiling Tiles
Styrofoam ceiling tiles offer numerous benefits. They enhance the room's appearance, often overlooked due to focus on walls and flooring. Additionally, these tiles provide an extra layer of insulation, contributing to a comfortable home environment in all seasons. Maintenance is another advantage; once installed, they require minimal upkeep. If desired, they can be painted, and for those who smoke, a quick coat of paint can easily refresh the ceiling. A sealant can be applied after installation, but it's not a necessity as the tiles fit well together.
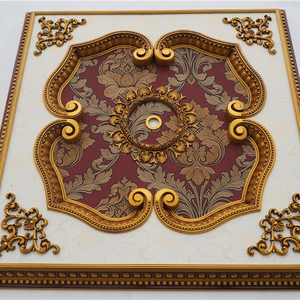
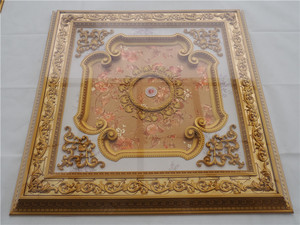
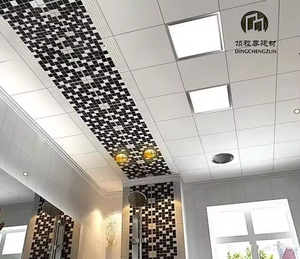
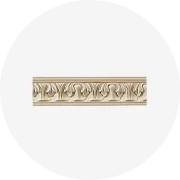
The Aesthetic Appeal of Styrofoam Ceiling Tiles
Styrofoam ceiling tiles can significantly enhance the aesthetic appeal of your home. They come in a variety of finishes and patterns, allowing you to elevate your room's look. Whether you prefer a modern pattern or vintage-inspired looks in antique metal finishes, these tiles can add a lot to the overall ambiance. They can even be used to hide a dated popcorn ceiling, transforming it into a much more attractive surface. For a more elegant look, you can recreate the look of a coffered ceiling with far less effort using Styrofoam ceiling tiles.
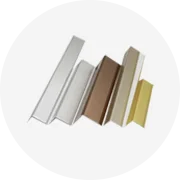
Choosing the Right Styrofoam Ceiling Tiles
Choosing the right styrofoam ceiling tiles for your home involves considering various factors. Styrofoam tiles come unfinished, allowing you to paint them in any color of your choice. This flexibility makes them a perfect fit for any home decor style. Additionally, they are available in a wide variety of patterns, colors, and designs, offering endless possibilities for customization. When choosing your paint, opt for plain ceiling paint and a rough-textured roller to cover any indentations. Remember, styrofoam tiles are not only aesthetically pleasing but also practical, being easy to maintain and durable.
Consider Your Home's Style
When considering your home's style, styrofoam ceiling tiles offer a versatile solution. They can be painted any color to match your interior design. Whether you prefer a single color or a multi-color scheme, these tiles can emphasize your chosen design. If you're aiming for a natural look, there are 3D wall panels that replicate stone and wood. For a warmer environment, opt for warm colors like yellow, red, or bronze. Remember, if you choose a dark wall design, your ceiling should be lighter to avoid making the room feel too small.
Understanding Different Styles of Styrofoam Ceiling Tiles
Styrofoam ceiling tiles offer a variety of styles to suit your aesthetic preferences. For a uniform look, choose one style, or mix and match for a contrasting pattern. Bead board ceiling tiles can make a small space appear larger and can be painted in any color for a contemporary or traditional style. The Spanish silver Styrofoam ceiling tile gives the appearance of faux metal, adding rugged beauty to a chic interior. If you're aiming for an elegant look, Styrofoam tiles can help you recreate the look of a coffered ceiling with less effort.
Installing Your Styrofoam Ceiling Tiles
Installing Styrofoam ceiling tiles begins with preparing the surface, ensuring it's clean, dry, and free of dust or debris. Find the center of your ceiling for the most appealing layout. Apply adhesive to the backs of the tiles and press them into place, starting from the center. Ensure proper adhesion and spacing between the tiles. After installation, apply a bead of caulk at all tile seams for a seamless appearance. Remember, the surface should be stable and hard, and not soft or unstable like a popcorn ceiling.
Preparation for Installation
Before installing your Styrofoam ceiling tiles, it's crucial to prepare the surface. Start by removing any loose plaster, paint, or wallpaper. Draw a chalk line in the middle of the room, preferably through the light fixture electrical box. Apply adhesive, such as Styro Pro glue, which is available in our store. Note that installation over popcorn ceilings requires more adhesive than for plain drywall or plywood ceilings. Install the first row of tiles along the chalk line, ensuring it's as straight as possible. Work your way to the sides, installing whole tiles first, then cut pieces.
Step-by-Step Installation Guide
To install Styrofoam ceiling tiles, start by finding the center of your ceiling. Apply adhesive to the back of your first tile and press it into place, ensuring the edges follow your marked lines. Install tiles in parallel rows, keeping edges as close together as possible. Trim tiles at the room's perimeter for a good fit. Once all tiles are installed, apply a bead of caulk at all tile seams to ensure a seamless appearance. Remember to press each tile with enough force to spread the adhesive evenly, but avoid damaging the tile surface.
Maintaining Your Styrofoam Ceiling Tiles
Styrofoam ceiling tiles require minimal maintenance and cleaning. Simply wipe them down with a damp cloth to keep them looking fresh. If you accidentally stain your tiles, you can clean them in the same way or repaint them. Despite their lightweight nature, these tiles are highly durable and can last for many years with proper care. They are also safe, with many vendors offering tiles lined with a protective coating to prevent fire spread. Remember, the tiles are weightless and easy to handle, making maintenance even easier.
Routine Cleaning and Care
Styrofoam ceiling tiles require minimal maintenance and cleaning. Simply wipe them down with a damp cloth to keep them looking fresh. If you accidentally stain your ceiling tiles, you can clean them in the same way or opt to repaint them. Since these tiles are made of styrofoam, they are very easy to handle and care for, making them a practical choice for any homeowner.
Repair and Replacement Tips
When replacing damaged ceiling tiles, remove the staples securing the tiles to the framework using a staple lifter. For new tiles, ensure they interlock with the existing ones and staple along the extended lips. If replacing tiles in the middle of the ceiling, cut off one lip and use glue to adhere that edge to the framework. Check your lineups frequently as tiles can be inconsistent in sizing.
Conclusion
In conclusion, Styrofoam ceiling tiles are a versatile, practical, and aesthetically pleasing solution for any homeowner looking to revamp their space. With their rich history, variety of styles, and ease of installation and maintenance, these tiles offer a unique way to transform your home. Whether you're aiming for a modern look or a vintage-inspired design, Styrofoam ceiling tiles can help you achieve your desired aesthetic while providing additional insulation and requiring minimal upkeep. So, why not consider Styrofoam ceiling tiles for your next home improvement project? They might just be the unexpected beauty you've been searching for.